Hello again! Found my way back here.

   It’s winter again. Today is Tuesday, and we have received over one foot of snow so far, at 14:00 hrs. Not a record-breaking amount, but a lot for us, since we had a completely green Christmas. I was actually gardening on Christmas day, in a t-shirt!!!

Last week ended with a deep freeze, so deep we lost the mercury on our thermometer. The coldest this thermometer drops to is -30 C. It has crept back up a little, only to land us in a very real snow storm. Not a  raging, windy, howling and blustering storm. Only a constant, heavy fall of rather fine flakes, collecting on our window sills and everywhere else, high enough to prevent seeing out, is what we woke up to today. I dug out the seeds and other treats we put out for the birds and squirrels, but it got re-buried within 30 minutes. The crows are cawing and chatting… We are privileged to host 5 crows almost every day,  at our feeding station!!!

But I am not here to talk about the birds or animals or the weather! I got rather busy last year with many projects. Some from the local Super Heroes group, others from the 501st, weddings and proms and finally quite a few personal things, such as my first ever, absolutely (looking) accurate Tudor gown and other costumes needed for our first visit to a Renaissance Fair in the U.S.A. My own Tudor outfit took very close to 300 hours. There was a lot of hand embroidery, as well as free-motion machine hand-controlled embroidery, beading and hand-couching and a lot of hand sewing to get it all together.

It looks like I am slipping into talking about that project, rather than talking about my K-Coats (which are what I intended to discuss!!!!!!). I also started making K-Coats last year.  In fact I produced 34 of them!!! Some were commissioned, most were just coats I HAD to make!!! That was what I thought to write about today. So which shall it be?

I think that now that I have started, I will continue with the Tudor outfit. I am very proud of it. Since it takes a lot of room in the closet, Justin suggested we keep My Lady on her mannequin, in the living room, near the fireplace. A permanent exhibit of what I consider to be the apotheosis of my *making* career. I wore it only 4 hours. Maybe even not quite.

tudorblogg (1)

Our Tudor couple.

The whole RenFair experience was new to us. We were invited to join my friend and her husband at the Bristol, WI. Renaissance Fair. Then I invited another friend to come and she brought one daughter and a niece too!!! The Bristol Faire is considered to be the *best* RenFair in the country. Their time-frame is late Elizabethan. I chose late Tudor as our era for our costumes.

Our first look at the Entrance to Bristol Renaissance Faire!!

Our first look at the Entrance to Bristol Renaissance Faire!!

I could go into the whole story of how and why Tudor times have always been my favourite era in history. I think I may have touched upon that in a past entry of my blogging. If I haven’t, I will come back to that, later here, or in another blog.

There is so much goes into making a costume (or any piece of *meaningful* clothing). Especially for me. THIS Tudor costume has been decades in the desiring, thinking, preparing, envisioning, designing etc. and also collecting of fabrics and trims, embroideries, beads, gems and buttons. My use of burgundy for it is not surprising at all. In fact, burgundy has been a favourite of mine all my life, probably because of my love for Tudor costuming. I used silk for the outer, final layer of the garb. I made a pair of stays two years ago… in hope that one day they would be used within their proper context. I made the stays to go to the 5th Anniversary of the Ottawa Steampunk group’s gala. I was thinking ahead. There was a chance that I would be going to a RenFair in the next couple of years, so my corset for the Steampunk Gala was actually a Pair of Stays.

My reversible pair of stays.

My reversible pair of stays. Note the blackwork embroidery at neckline and sleeve hems. All the ridges seen here smooth out very flat once I am wearing it.

I made the stays, with all their boning, and the outside layers in two silks: a red one, with black sketches of roses, for the inside and a pale blue heavier brocaded silk (bought in Shanghai!! The Mecca of silks!!!) for the outer layer. In fact, the stays were made to be reversible. So I could wear them red, or blue. I cheated in the end. I have made many corsets and gowns requiring lacing up at the back. I have worn many myself. This time, I decided, I would use a zipper (OOOOARGH!!! OH!!!! SHAME!!!) to make it easier to get on, if I had to do it alone. At the Fair, my friend pointed out that if I had put lacing on them, I could have reduced my silhouette by several inches. Perhaps. Yes, perhaps. But, (when I first made them), I wanted to be relatively comfortable… and Tudor stays, in any case, were not made to reduce the size of the wearer. They were made to force the body’s shape cylindrical. Not curvaceous. No emphasis on the chest size (eyebrows raising in a knowing way). In fact, the stays rather flatten the bust: they push it up, but do not reconfigure it. I didn’t really mind that I could have been 5 inches smaller. I was glad, actually, in the end, that the stays straightened and helped support my back, without forcing me smaller. It was a very hot and humid day (31C) in Bristol when I wore My Lady Tudor. I stayed in the shade most of the day… The first 2 hours were a rather precarious time, when I relied on my cane for stability and I was really fighting fainting from the heat… then I got used to it all, and spent another two hours parading about as if I had been born to that clothing!!!

My Lady Tudor is based on three or four paintings I finally chose to help design this gown.

elizabeth1546

janeseymour  bookcover

I was determined to make it as accurate as can be. Some parts were made to *look* perfect. I didn’t make a separate placard. I made the bodice all in one, with folds in the fabric in strategic places, to make it look like there was a separate placard and I sewed on brass pin heads in the right places. In Tudor times, they preferred to cover the lacing up part, which was at the front, unlike the Victorians’ dresses and corsets, and they covered this lumpiness with a placard. Enhancing and further shaping the body into a cylinder. Not a shapely (eyebrows raising up and down) bosomed bodice. The bosom was pushed up. Some RenFair girls wear their stays WAY too tight (I felt) to REALLY do that push-up thing. I actually asked one or two of them in Bristol if it was painful having your breasts pushed up so high, you could rest your chin on them….. Apparently, it is not uncomfortable.

I digress again. Such is my mind. Wandering and remembering and commenting! The three paintings I used as reference guides were: the cover of the book which gave me the instructions and guidelines of all the parts I needed for the costume. This book is: *Creating Historical Clothes*. The painting is of a 16 year-old *woman* in 1565. I also used the painting of Princess Elizabeth, at age 13 or 14 (1546). Then there was a painting of Queen Katherin Parr, the one who out-lived King Henry VIII. But at the time of the painting she was simply a*Lady*, wife of Lord Latimer, but the depiction of her clothing was very instructional. Another painting which had good details and inspiration, was one of Queen Jane Seymour: the one who died of childbirth and is renowned to be Henry VIII’s *favourite* wife. Favourite only because she is the only one who bore him a son who survived early childhood… But that is a whole other story and subject to many thoughts of mine…. Not needed here!

All these dresses were red to burgundy, by the way! I got jewellery details and sewing details from all these paintings.

I looked for more books and more information… I eventually based all the details on these paintings and made what I hoped were correctly looking historical parts. When I strayed from *CORRECT*, it was only so I could get into this clothing on by myself. With very little help if required. That’s why the placard is included in the bodice’s  design. Just one piece, yet it looks like two or more. Really. It does!!! I have had a lot of experience making historical clothing easy to make and put on, yet LOOK exactly right. Does not take away from the final costume!!!

There was the blackwork embroidered linen under-chemise. Then the under-skirt, then the *hoop skirt*, then the kirtle (or kyrtle), in two parts in my case.  Then finally the over skirt  comprised of the fore skirt, which is the flashy showy part of the skirt which is sewn to the rest of the skirt which is always hidden. The bodice was layered this way: chemise (well embroidered, in blackwork, at neck and sleeve hems), stays, kyrtle top, silk bodice top.

detailsleeve

Close up of the over sleeve with the linen chemise peeking through. Note the blackwork.

As big as I thought my bum roll turned out, it seems I still managed to make it smaller than many I have seen since. It feels cool though!! Then the various skirts and hooped parts. Then, FINALLY, the outer skirt. I found some beautiful burgundy silk at a second-hand shop. It was actually a brand new queen-size duvet cover, silk on BOTH sides, bed skirt and two king size pillow shams. All silk, all clean and new!!!!

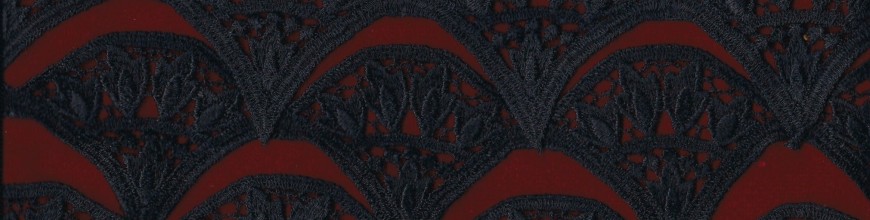
The fore skirt had a very good pattern on it, but it needed some more pizazz…. So I over embroidered, free-hand machine embroidery, a good part of the gold in it. As it still needed *more*, I also added gold metallic trim which I decorated further with black satin soutache and eventually pearlized beads in various sizes and larger gemstones to it. This fabric also served as the under sleeves, which had slashes cut into them. The picture below shows the embellishments on the fabric for the over sleeves.

beadingsleeve

This is the main fabric for the fore skirt and the under sleeves. It required quite a bit of extra dazzle.

detailwholesleeve

Here you can see the over sleeve, covered by the over fold, which was couched and beaded as well as black work added to give it more texture.

I made the French Hood too. There were many hours of beading in that!!! I was happy with the end result. I used a pattern for it, and although I reduced the size of it when I cut the first piece, after it was all done, the various layers of cotton and felt added some volume to it. I did sew the ties for it, which go under the neck, to help hold it up, but they drove me crazy in my fittings. So I altered it by adding a hair comb on the inside, to attach it to my hair. That was a good idea: it stayed on my head very comfortably that way and didn’t strangle me, the way the ties had done.

hoodside 20150816_164738

I also made my husband’s costume…. He had a few stipulations though: NO *bubble pants*, it must have matching fabric to mine, no silliness. How does one achieve *NO silliness* when reproducing a historic costume? They wore these clothes with absolute faith that these were what is right. The same way we do with all our trends and fancies today, in the 21st Century1!! And his costume adventures will be the subject of my next blog I think!!

Sari Sailor Suit

Earlier this week I presented Veronica to you and mentioned Jenny. Jenny is now ready for you.

If you haven’t read my last post, I will explain who they are. Veronica and Jenny are two patterns produced by The Tailor’s Apprentice. Veronica is a 1940’s evening gown with a capelet and Jenny is a sailor suit, also from the 1940s. Lorna McKenzie is the designer and she has used actual clothing from the WWII years to draft these patterns. These were clothes owned by Miss Page. Lorna tells her story on her website. She also has 3 other 1940s patterns at the moment: a wedding dress, a day dress and an overall type thing! There will be more.

It took me a couple of days after downloading the digital patterns from Lorna to decide which fabric from my stash I would use for Jenny. It was a cinch choosing the fabric for Veronica!!! That’s why I started with that pattern. In the end, I chose to use another of my saris to make into the sailor suit. Once it was done, I was amused to observe that I had turned the formal gown Veronica into a day dress and the casual sailor suit into a dressier outfit, as you will see. Asi es la vida!!

By the way, digital patterns are as easy to use as store-bought ones. After receiving your file by e-mail, you print it out and re-assemble it, a bit like a puzzle, and then proceed with cutting the paper up and then cutting your fabric from it. When I say *like a puzzle* it actually is easier than that! All the pattern pieces are logically and clearly numbered, so all you need to do is place them in rows and columns.

So, back to Jenny in a sari. I love using saris for many of my clothes: the fabric drapes so nicely! And the colours! and the metallic thread borders! Having said that, this sari is black with pewter and copper metallic thread borders.

The sailor suit consists of a short-sleeved top complete with little square scarf thing at the back that ties at the front and a pair of trousers. The very attractive design component of this suit is how the top is yoked at the front. It has a pretty swooping curve. The pants are straight.

I started with the top as it is more *involved*. I prefer to do the difficult thing first. Once again this pattern is in three sizes. I cut everything in the large size, for added comfort. There are two small darts on the blouse. The sleeves also have darts or pleats at the shoulder which give them a slight puff. The ’40s’ puff!!

The instructions are clear and precise and assembly went well. Here are the things I changed though, customizing it to my preferences. First: I lengthened the top. In the pattern picture, it is a short blouse which just covers the trouser top. As I am a *certain* age, I prefer my dressier tops to be tunic length: ending about 2/3 way up my thigh. This entailed widening the hemline by simply lengthening the sidelines a little and I chose to make a slit on either side for more comfort.

I also wanted my sleeves to be full length. But they can be rolled very flat for times I might want it shorter because I made them straight down.

Same as for Veronica, I omitted the side seam zipper. I just didn’t feel there was a need for it, for me, and besides, I don’t like the feel of a zipper on the side there. It stiffens the fabric when using a soft one like sari material. The last change I made was to keep the scarf thing apart from the blouse, rather than sewing it to the neck edge. The instructions guide you through using a bias tape (made from the same fabric and for which a pattern piece is supplied) to finish the neckline. I still used the bias tape. I added one thing: because I was using a sari with a beautiful border, I wanted some of that around the neckline. I had to place it correctly in line with the edges of the neckline and make it stop at the top of the border that was part of the yoke. See picture.


The pants are only four pieces. I widened the pants, to really take advantage of the border; in addition, I like wearing skirts in summer but I find them inconvenient at times. So lately I have been making pants wide at the bottom and which are fitted at the top and they look like skirts (or Palazzo pants) because I almost always use soft and flowing fabrics. Comfort and elegance all wrapped in one, if I do say so myself! 🙂

There is no waistband but an inside facing that helps keep things tidy and flat. They have a side zipper and because I liked the fitted look of these, I did use a zipper rather than my usual elastic waist. The well-written instructions guide you through that installation smoothly. There are two small darts on the trouser back pieces which make it lie completely flat to your rear end.

The last thing I did was make a narrow casing with the facings and the pants in the back. Here’s how: after attaching the facings to the pant top, I tacked down the facings at all the seams and then sewed across the back, from side seam to side seam, about 1/2 in. down from the top. Then I slid the elastic in there, sewing it down on either side seam. I cut my clothing slightly bigger than I actually need for comfort. Sometimes that makes the pants droop. So by putting that narrow little elastic in the back, it holds the trousers up snugly at your waist(or wherever) and makes the front look taught and smooth, without bunching the back at all. There is more space around the middle and bum for sitting in that way too. This *flatness* is also necessary when wearing a lightweight fabric top. The tunic shows no bunches or anything when you are wearing it. Of course in the picture it is slightly gathered: cut the elastic just long enough for it to stretch gently and it will then lie flat on you.


This pattern has extra long legs because Lorna offers the option (with instructions) of making cuffed pants as was stylish in the 1940s, even for women. Again, I wanted the sari border to be the decoration at the bottom, so I cut the pants to my usual length. Placing the pattern pieces correctly on your borders is crucial: I lined up the pattern grainline on the cross-grain(that is the weft of the fabric, as opposed to the grain which is on the warp. They cross at 90 degrees.) in order to get the border at the bottom.  Come to think of it, that’s what I did for the sleeves too: put the sleeve hem on the border and the cross-grain of the fabric became the grainline on the pattern.

As the end of assembly was nearing, I realized that this outfit would be a very appropriate evening ensemble, not very formal but *nice*. I also saw that it looked a lot like an Indian set, of course, because I used the sari and it’s embellished borders to the max! The last thing I made was a wrap with the last bits of the sari and I can use that on cooler nights.

So in the end, I made Veronica the evening gown into a day dress and Jenny the day outfit into an evening set. Twas ever thus! While discussing the changes I made with Lorna, she pointed out that the original pattern called for a tunic length top, but that *the hipsters thought it would be better shorter*, so she made a short top for this pattern. I simply returned the pattern to its original design!


Passion for the Fashion, part II: The Accessories.


My first post about the 1912 Afternoon Wrap from the VPLL website Titanic Sewing Project talked about how I came about making the wrap. This post is about how I dressed it up a little to be able to wear it at the Titanic Dinner we are going to at the Fairmont Chateau Laurier here in Ottawa. The Chateau is commemorating the Titanic disaster because the man responsible for its existence, Mr. Charles M. Hays, was supposed to be at the opening ceremonies but he died on the Titanic on his way back from London, England. They had to postpone the special ceremonies for over a month.

My husband surprised me on Thursday morning with reservations for the Titanic Dinner! The dinner is on Sunday evening! What to wear? what to wear? Not in a panic but simply which hat shall I wear? I recently made quite a few 1912 or thereabouts hats. What outfit? I wanted to wear my newly made Easter hat and a matching gown I would make that day but after consulting with the Ladies from the 1912 Titanic Sewing Project on Facebook, I realized that hat is simply not right for a dinner. It is an afternoon hat or a luncheon hat… NOT a dinner hat. A hair ornament with feathers and or ribbon and or tulle and any mix of the previously mentioned would be better.

So I set out in search, again, for suitable materials to make the hair ornament. I picked out some antique metallic lace, a couple of brooches, feathers and of course a comb, as this ornament should sit in some kind of *updo*. There were many types of feathers and I decided on peacock after observing that certain feathers have more blue which perfectly matched the blue of the Afternoon Wrap and its skirt. The skirt I already made about 4 years ago and is a very long and full flowing skirt.


In order to hide some of the discoloration of the metallic thread and also because I wanted to narrow down the piece of lace to fit my wide comb comfortably, I folded over the two ends and sewed them tightly into a strong support for the feathers and brooch I intended to add to it. It looked lovely but didn’t show up very well. 😦 So I added a piece of the blue satin behind the lace and sewed them together at the edges and a little throughout the lace to make it sit flat. After that I sewed on the brooch which I assembled from 3 brooches: I found two very small pins with blue rhinestones that were the right match for the blue and the gold was a good match for the gold on the pendant pin. The bigger brooch has a large drop pearl dangling from it. It appealed to me!

Once the brooch was solidly attached to the lace/fabric background it was time to add the feathers. Many ideas were considered…. and after a long while I chose 5 peacock feather *eyes* and use the stem of a very long plume without its ornate end to have some cascading long *stalks* floating behind the smaller and lower row of *eyes*. Steaming the feathers after arranging them makes them stick together properly again. My comb was finished by the end of Thursday and met with many of the Ladies’ approval.

All evening though, I kept on thinking that although the outfit looks very nice, it isn’t really appropriately *evening* in spite of it being satin. The main problem with it is that the skirt is so much fuller than what would have been worn in 1912. I didn’t have enough matching fabric to make a new narrow skirt nor was there anything in my stash that looked right with it. Besides, I like the butterfly border on the skirt: it obviously works well with the same border used as a belt and the back design for the Wrap!

I also had a handbag on my mind… I didn’t have anything in the right colours to use for a period dinner… I went to bed deciding that I would embroider a butterfly on a remnant of the blue satin and make a small clutch with it.

The plan was in my head, I was able to get to sleep! hahaha!!

My morning on Friday was busy with serious appointments and visits… I had to wait for the afternoon to get back to my outfitting!!!  I set upon the embroidery work and by the end of the day I had two panels of embroidered fabric ready to make into a bag. Even though this is machine embroidery, it takes several hours to get two embroideries of this size done. I embroidered a butterfly design which is almost the same butterfly as on the fabric’s border on one panel, using the wrong gold side of the fabric as its background, and a moth with a sunset scene in its wings for the other panel. The embroideries were done with a layer of quilt batting under the fabric: it gave the small bag extra texture.

Satisfied with that work, I found a zipper (Horrors!! They had no zippers in 1912!! But as I had no fancy bronze clasp and neither did I want to make a flap which would have covered the embroidered insects I went for the next easiest thing to do: a zipper.) and left that day’s work at that.

I went to bed still looking for a way to make my inappropriately wide and full skirt into a straight, evening look skirt. Cutting it down to narrow it was out of the question. The other secret about this skirt is that it is actually a pair of very wide pants. My mother had something like this in the seventies. They called them :*Palazzo* pants. Do you remember that?

First thing I did Saturday morning was finish assembling the clutch. I sewed some of the beaded trim in the bottom curve of the bag and this made it shine!


But what about the skirt? I knew that I should have some kind of sheer and straight front panel. At least that is what I preferred in the look of the many dinner and evening dresses I have looked at from that era! Having a panel like this would partially hide the full skirt. It could hang either horizontally across or diagonally. Either way it would have to be placed so that the butterfly border could be seen. Last night I went in search of fabrics in my treasury… there was nothing that caught my eye. I went to bed feeling a little disappointed.

After breakfast this morning, back down to the studio I went because overnight I remembered that I have a box of organzas and other sheer bits that I forgot to check yesterday!

No royal blue. 😦 No gold. 😦 Right at the bottom there was an oddly shaped piece of navy blue organza!! Rather scrunched. But upon opening it up, and checking it against myself, I established that not only was there enough but that the diagonal piece it was cut into would be the perfect shape for my *tabbard* of sorts!! I immediately decided that I would add the last of the blue beaded trim I made for the Wrap if there was enough of it… what else can I do? What else? What else would be the last touch??????

There was enough beaded trim. YES! 🙂 And after checking to see if there was enough of that: I cut the last bits of the butterfly border off the remnants and although not quite enough to extend the full length of the hem, I sewed it on to the organza. I will drape and pin to properly settle everything when I get dressed tonight.


Since the seam between the organza and the satin would show anyway, I sewed over it with gold metallic embroidery thread that matched the gold of the fabric. (I have 10 different shades of metallic gold in my threads!!!) This gave it extra dash. Then I sewed the beaded trim to the very edge of the butterfly border. The weight of the beads pulls the overskirt down and prevents it from flying up due to static or other sources. This piece of fabric will wrap over the skirt, creating a flat narrow look and matching the outfit for a proper ensemble look!!! And I still have my wide skirt for summer time!!!

I will post pictures of me wearing this outfit later on tonight or tomorrow!!