
Last week I requested the Spring Mantle from the VPLL website. I had finished all my *real* work and was ready for more 1912 sewing. I thought making this little mantle would be fun… I still have so much fabric in my stash that needs a life!! :-).
After downloading it and printing it, I read the instructions and somewhat regretted my impulse a little. It requires 10 yards of bias cut fabric to be gathered into gathered trim for the sleeve edges and the front! I hate making gathered stuff! But I bravely took the pattern to my sewing studio and searched for a large enough piece of fabric in my stash. I decided to make it reversible when I couldn’t decide which to use: the royal blue or the coral. I have had that piece of 100% silk coral brocade for many years. I always knew I would use it for a jacket of some kind as it is fairly thick. The blue satin brocade with dragonflies was a remnant. Lucky there was enough for this!!


I established that the pattern was a perfect size for me, so no changes to it were needed. BUT, I had to be creative to fit the pieces for the mantle in the slightly narrow fabric remnant. The blue was just wide enough to hold the pattern pieces

but the coral was too narrow. I had to piece two corners of each side: at the sleeve and on the side back. They don’t really show as there is a wide trim covering most of those seams.
Starting with the blue fabric, I proceeded a little differently from the instructions. After cutting the required two sides and 4 gussets, I immediately sewed the gussets in, two to each half jacket.
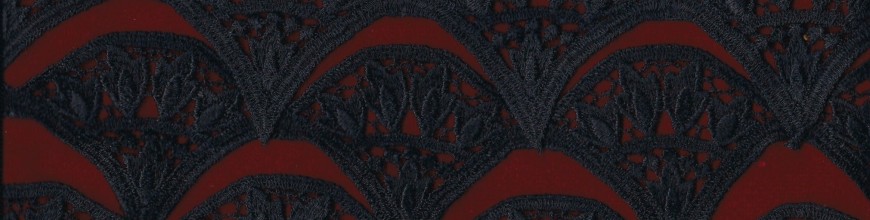
I was able to find a small piece of steel-blue Shantung (textured with flubs) silk which perfectly matched the blue in the dragonflies’ wings.
After cutting it into approx. 10 yards of 2 1/2in wide tape, I gathered it all into a 3 yard length.  I got that number by measuring the width of the cuffs (following the pretty curve it has) and the length of the band (which is indicated on the pattern) along the front. This band doesn’t go around the back of the mantle. I got 108 inches, or 3 yards. After gathering it, I pressed it a little to help stop it from twisting about while it got pinned to the front and the sleeves. I marked the sewing line for the wide trim by sewing a long-stitched line at 2 1/2 in from the outer edge. After placing the right side of the trim on this line I could then sew it fairly easily. After sewing it down, I flipped it back and pinned the edge of the trim to the edge of the blue fabric and basted them together. Here again, I changed the design by NOT adding another layer of fabric or batting under the trim. The gathers were puffy enough for me! The two blues I chose for this side were right for each other but the colourway lacked *Oomph!*.

I dug out various braids and ribbons and at first chose a lovely violet 1″ braid to sew alongside the trim… but because it was braided and the trim was already rather textured by its gathers, my daughter pointed out that it seemed too busy… :-(. She was right. So I went in search again and pulled out a satin cord in a light red (as opposed to brownish) burgundy that helped pull out the pink and added a dash of life to the mix. I then proceeded to sew the cord right up against the gathered trim with a narrow and long zig-zag stitch.


This is when I made each piece into 1/2 a jacket shape by starting sewing at the sleeve edge, along the sleeve, diagonally across the gusset and down to the bottom edge. But I did not sew them along the middle back together yet.

I chose to trim the coral side of the mantle with a Shantung silk in medium creamy orange.


This was another remnant. It blended well with the smooth charmeuse finish of the background coral and two other brighter orange colours of the bamboo Jacquard silk. I didn’t want to gather this trim as the other side was already puffy enough. Again, I found that although these colours were made for each other, and maybe because of that, there wasn’t enough contrast.


I went back to my braided trims and found a piece of very pale coral narrow braid, only 1/2 ” wide. My first idea was to sew it right on the edge of the Shantung, the same way I had done for the burgundy cord on the blue side. I changed my mind later on and elected to sew it 1/2″ lower than the edge of the darker orange Shantung.
In order to have exactly the right size pattern, I simply traced the band shape from the front and the sleeve cuffs onto another piece of paper and added about 3/4′ to its width. (Pictures above show this step). Then I cut the orange Shantung trim. I ironed down 1/4″ the inside edge of this trim and carefully pinned it in place. This band was top-stitched to the coral half-mantles before I applied the 1/2″ braid half an inch below its sewn edge. I felt it made it more dynamic that way. The unfinished edges of both the trim and the coral Jacquard were basted together. Then I sewed the seam making the sleeve down to the bottom edge of the mantle, the same way I did for the blue side.
I now had 4 half-mantle pieces. In order to sew as much as possible by machine… and have stronger seams closing the several layers of the cuffs and front edges, I had to sew the sleeve edges first, right sides together, by placing one jacket piece inside the other inside out. After sewing this, I pulled the blue jacket out through the orange jacket’s sleeve and found myself with half a reversible mantle! I did the same with the other side.


After pressing all the edges to have them lie a little flatter and look cleaner, I proceeded to sewing the two blue centre backs together, changed the thread and sewed most of the two coral backs together. I remembered to leave a small opening to turn the jacket right side out and sewed up the remaining 4 inches by hand. Another little steam press for the middle seams and my jacket was ready!

")
")
")
")
")

Thank you for all the details. I’m in love with your mantle. So in love.
Thank you Leila!!! It was fun to make and I will be wearing this often this summer, I’m sure!! 🙂 I am looking forward to reading about yours!
Oh my good lord. This, my lovey is absolutely, positively, terrifically stunning.
I also want to mention that I really love how you write. You pull me in, and I just keep reading because I can’t stop!
How gorgeous! It’s amazing how different you were able to make the two sides look! I’m in awe! 🙂
Wow! You put this together so beautifully. Thanks for sharing and inspiring me as well. Wow!
Impressive work! Great idea making it reversible.
Absolutely stunning, and I LOVE the reversible concept. Both sides are amazing….
Just absolutely gorgeous! I love the idea of the wrap being reversable. Great, great job!
Absolutely lovely! Great idea to make it a reversable wrap. Just a fantastic job!
That is the loveliest garment that I have seen in a long time. Wow, your fabric stash definitely wins for classiest fabrics. Just stunning. Your directions are very clear and easy to follow too.
regards,
Theresa
Thank you Theresa!!! I have had a stash for at least 30 years… As hard as I try to use it up, it seems there is always the same size pile to get through!! I have been lucky in that many of my clients allowed me to keep the remnants… and I am constantly on the lookout for lovely fabrics. I scour flea markets, friends’ attics or second-hand shops fairly regularly!! Sometimes I will even splurge on full-priced bits or buy up entire bolts if there is a good sale. A REALLY GOOD sale only!!hahhaha!!!
I really loved this mantle, and thank you for your detailed instructions. I think this pattern will be mine for May.
I wondered if my *instructions* were clear enough!! You should find this pleasant to make… I did!! In spite of the gathers!!! hahaha!!
This is really inspired work. Your taste in fabric colours and contrast is very good. Looking forward to seeing more of the VPLL 1912 Project patterns.
Thank you! I enjoyed making it!! and yes, there will be more!
[…] page. Once one of the sewing group participants posted a photo of how the gussets were sewn on her mantle and that’s when I finally got it. See, gussets on sleeves don’t always go in the same […]
[…] Reversible Ladies Mantle by Roxanne at Sewing the Titanic […]