Rose Marie: a 1940’s Wedding or Evening Gown.

RoseMarie2 RoseMarie1 RoseMarie1 - Copy

This is another formal gown, named Rose Marie, by The Tailor’s Apprentice. As usual, I received it as a .pdf downloadable pattern (e-pattern or digitized pattern). This one had more pieces and took much longer to re-assemble but it was well worth my while!
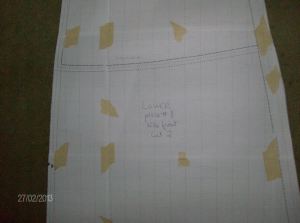
HPIM6898Re-assembling the printed sheets and preparing for cutting.

The pattern allows you to make several outfits: a wedding or evening gown, with or without sleeves, long or short or even with flounced sleeves. You can make it short for day wear, or make it into a two-piece suit, again with a selection of sleeves. I chose a fabric I brought back from a holiday in Curacao. It has a vaguely vintage print on it which I thought suitable for this pattern.

I chose to make a two piece, sleeveless outfit as this fabric is very light cotton and would only be worn in our hot months… and I wasn’t sure there would be quite enough, as it was much narrower than usual. It was the right decision in the end as I had to be a little creative with the top and make a *stepped* front hemline. If you look at the picture of the whole outfit (below), you will see that the center panel of the blouse is a little shorter than the side ones. I didn’t bias hem that piece to prevent *cutting* the visual line across an unflattering width…. 😉

Rose Marie has the typical 1940’s sweetheart neckline which I find so feminine and pretty, especially for summer clothing. As I mentioned, I made it sleeveless. The instructions were very helpful and clear, explaining how to sew up the pattern in true ’40s style, with a side zipper or hooks and eyes or snaps. I opted for a zipper and although I used an invisible zipper, I did follow the instructions to make it hidden under a narrow placket. It does look better that way!

HPIM6907 Bias tape binding both front and back sweetheart necklines.

HPIM8064 The placket over the invisible zipper, on the side of the blouse.

HPIM8066 The bound blouse hemline.

As for the skirt, I chose to make an elasticized waistband (more comfortable and easier to pull on: my fingers have trouble these days with buttons, hooks and snaps even zipper pulls!) with an uneven hemline: the front being a few inches shorter than the back. There are instructions and indications on the pattern for making the skirt as well as for making a separate top.

In order to make an elasticized waistband, I cut the fabric straight up from the waistline, for 3 1/2 inches. That’s double the width of the elastic plus a little to turn under to make the casing. That seam line is sewn right on the waistline. I call this a *self-waistband*: it has no seams (less bulk too) and uses less fabric than making a facing which has to be sewn onto the skirt and then turned under to make the casing. I really had to be frugal with the fabric!!!

I made an uneven hem line because I wanted the skirt to be longer but because I realized in placing the pattern pieces on the fabric that there just wouldn’t be enough of it, I opted to make it shorter at the front and keep the length I wanted for the back.

One of the pictures included in the pattern shows a day suit of blouse and skirt. It shows how the skirt was trimmed with red (bias binding?) at the skirt hem and the same red is on the neckline and sleeve cuffs. I really liked that detail. I was able to find a light blue bias tape, pre-folded, that matched my fabric and so, I finished many edges with it: the curves of the sweetheart neckline both front and back and the lower hem of the blouse as well as the skirt’s hem. The binding adds a little body to the blouse’s hem and I like that effect.

HPIM6906  Pre-folded Bias Tape made hemming easy. It allowed me to have more length on the skirt as I wasn’t folding up a hem.

  HPIM8067  HPIM8065

The front and back views of my version of Rose-Marie.

Sari Sailor Suit

Earlier this week I presented Veronica to you and mentioned Jenny. Jenny is now ready for you.

If you haven’t read my last post, I will explain who they are. Veronica and Jenny are two patterns produced by The Tailor’s Apprentice. Veronica is a 1940’s evening gown with a capelet and Jenny is a sailor suit, also from the 1940s. Lorna McKenzie is the designer and she has used actual clothing from the WWII years to draft these patterns. These were clothes owned by Miss Page. Lorna tells her story on her website. She also has 3 other 1940s patterns at the moment: a wedding dress, a day dress and an overall type thing! There will be more.

It took me a couple of days after downloading the digital patterns from Lorna to decide which fabric from my stash I would use for Jenny. It was a cinch choosing the fabric for Veronica!!! That’s why I started with that pattern. In the end, I chose to use another of my saris to make into the sailor suit. Once it was done, I was amused to observe that I had turned the formal gown Veronica into a day dress and the casual sailor suit into a dressier outfit, as you will see. Asi es la vida!!

By the way, digital patterns are as easy to use as store-bought ones. After receiving your file by e-mail, you print it out and re-assemble it, a bit like a puzzle, and then proceed with cutting the paper up and then cutting your fabric from it. When I say *like a puzzle* it actually is easier than that! All the pattern pieces are logically and clearly numbered, so all you need to do is place them in rows and columns.

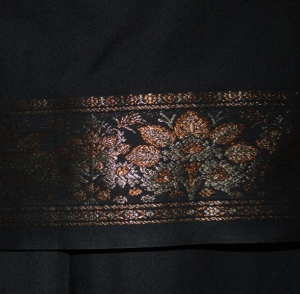
So, back to Jenny in a sari. I love using saris for many of my clothes: the fabric drapes so nicely! And the colours! and the metallic thread borders! Having said that, this sari is black with pewter and copper metallic thread borders.

The sailor suit consists of a short-sleeved top complete with little square scarf thing at the back that ties at the front and a pair of trousers. The very attractive design component of this suit is how the top is yoked at the front. It has a pretty swooping curve. The pants are straight.

I started with the top as it is more *involved*. I prefer to do the difficult thing first. Once again this pattern is in three sizes. I cut everything in the large size, for added comfort. There are two small darts on the blouse. The sleeves also have darts or pleats at the shoulder which give them a slight puff. The ’40s’ puff!!

The instructions are clear and precise and assembly went well. Here are the things I changed though, customizing it to my preferences. First: I lengthened the top. In the pattern picture, it is a short blouse which just covers the trouser top. As I am a *certain* age, I prefer my dressier tops to be tunic length: ending about 2/3 way up my thigh. This entailed widening the hemline by simply lengthening the sidelines a little and I chose to make a slit on either side for more comfort.

I also wanted my sleeves to be full length. But they can be rolled very flat for times I might want it shorter because I made them straight down.

Same as for Veronica, I omitted the side seam zipper. I just didn’t feel there was a need for it, for me, and besides, I don’t like the feel of a zipper on the side there. It stiffens the fabric when using a soft one like sari material. The last change I made was to keep the scarf thing apart from the blouse, rather than sewing it to the neck edge. The instructions guide you through using a bias tape (made from the same fabric and for which a pattern piece is supplied) to finish the neckline. I still used the bias tape. I added one thing: because I was using a sari with a beautiful border, I wanted some of that around the neckline. I had to place it correctly in line with the edges of the neckline and make it stop at the top of the border that was part of the yoke. See picture.


The pants are only four pieces. I widened the pants, to really take advantage of the border; in addition, I like wearing skirts in summer but I find them inconvenient at times. So lately I have been making pants wide at the bottom and which are fitted at the top and they look like skirts (or Palazzo pants) because I almost always use soft and flowing fabrics. Comfort and elegance all wrapped in one, if I do say so myself! 🙂

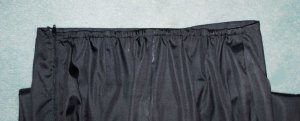
There is no waistband but an inside facing that helps keep things tidy and flat. They have a side zipper and because I liked the fitted look of these, I did use a zipper rather than my usual elastic waist. The well-written instructions guide you through that installation smoothly. There are two small darts on the trouser back pieces which make it lie completely flat to your rear end.

The last thing I did was make a narrow casing with the facings and the pants in the back. Here’s how: after attaching the facings to the pant top, I tacked down the facings at all the seams and then sewed across the back, from side seam to side seam, about 1/2 in. down from the top. Then I slid the elastic in there, sewing it down on either side seam. I cut my clothing slightly bigger than I actually need for comfort. Sometimes that makes the pants droop. So by putting that narrow little elastic in the back, it holds the trousers up snugly at your waist(or wherever) and makes the front look taught and smooth, without bunching the back at all. There is more space around the middle and bum for sitting in that way too. This *flatness* is also necessary when wearing a lightweight fabric top. The tunic shows no bunches or anything when you are wearing it. Of course in the picture it is slightly gathered: cut the elastic just long enough for it to stretch gently and it will then lie flat on you.


This pattern has extra long legs because Lorna offers the option (with instructions) of making cuffed pants as was stylish in the 1940s, even for women. Again, I wanted the sari border to be the decoration at the bottom, so I cut the pants to my usual length. Placing the pattern pieces correctly on your borders is crucial: I lined up the pattern grainline on the cross-grain(that is the weft of the fabric, as opposed to the grain which is on the warp. They cross at 90 degrees.) in order to get the border at the bottom.  Come to think of it, that’s what I did for the sleeves too: put the sleeve hem on the border and the cross-grain of the fabric became the grainline on the pattern.

As the end of assembly was nearing, I realized that this outfit would be a very appropriate evening ensemble, not very formal but *nice*. I also saw that it looked a lot like an Indian set, of course, because I used the sari and it’s embellished borders to the max! The last thing I made was a wrap with the last bits of the sari and I can use that on cooler nights.

So in the end, I made Veronica the evening gown into a day dress and Jenny the day outfit into an evening set. Twas ever thus! While discussing the changes I made with Lorna, she pointed out that the original pattern called for a tunic length top, but that *the hipsters thought it would be better shorter*, so she made a short top for this pattern. I simply returned the pattern to its original design!


Moving to the ’40s.

 Hello! I’m back! With the end of the 1912 Project came a temporary stop to my blogging. Not that I haven’t done anything since then!! I will write about some of those sewing projects later: *The Spirit of Hallowe’en* was one, complete with top hat and gown. There were a couple of wedding gowns… and I made a fall coat to match the Skants I posted about, as well as a three-piece set of dress, skirt and bolero made from a delightful insect print heavy cotton, amongst the more interesting projects… There were some textile-but-not-sewing projects done too. I made a few embroidered leather bags and other accessories as well as a few hats (including a top hat) for the Geek Market I had a booth in last October. Oh dear, I have just realized I have a lot to catch up on!

Through the 1912 Project I met many ladies from all over the world. Many own and run their own clothing/costuming, millinery, wig making or footwear businesses. One that caught my eye was Lorna McKenzie’s *The Tailor’s Apprentice*, out of Sydney, Australia. I followed her travels to England in late summer and wandered about her website. She recently posted asking for testers for her line of 1940s patterns derived from real clothing she received… She tells that story very well on her site: http://www.thetailorsapprentice.com/index.php/patterns/category/miss-page. As I enjoy period costumes and clothes, I volunteered by writing to her saying I would like to give it a whirl! Within that week I received two patterns in digital form, which I printed out very easily, really! I chose the sailor suit named *Jenny* and the evening gown called *Veronica*. There are several more: a wedding dress, a day dress and overalls.

The featured image and the two pictures below are The Tailor’s Apprentice’s pictures of the *Veronica* pattern.


Don’t be afraid of digital patterns: they are easy to use and anyway, Lorna gives very clear instructions on how to download, print  and reassemble them. The pages were clearly marked for re-assembly and the patterns are multi-sized too. Lorna includes well described and illustrated instructions to sew up her patterns: see the pictures below. I found them easy to follow and appreciated her personal notes on making it more *period accurate* if you want to.

So here are more thoughts and comments about Veronica, the evening gown with cape. I chose to sew that one up first because I have a lovely light-weight rayon that came to mind as soon as I saw the pattern on-line. It has a slightly vintage feel to it with its varying sizes of roses in red, yellow and royal blue with green leaves on a white background. I had chosen a similar recent style to use on it, but Lorna’s pattern just hit the mark in interesting details (like a sweetheart neckline and the way the princess line is formed) and of course, the vintage factor. Being a costumer, I always like the more unusual patterns if I am going to use any at all!! It will be perfect for evening wear to take on our little holiday in southern climes in January.

This pattern is for a *proper/formal* evening gown: it is to the ground and includes a separate short capelet. I don’t need a formal gown right now, I want a more casual dress, so I cut it to mid-calf, following the indications of where to shorten it printed on the pattern. The photographs below show the *shorten line* and then how I fold the sides to make cutting easier. I made the capelet though, as the gown is sleeveless and I tend to get cold in the evening, even in summer. This will dress it up perfectly and keep my upper arms protected from the breezes that crop up when the sun goes down.

I love using multi-size patterns, as they can be modified easily at the cutting stage. Shortening the skirt is done mid-way and I like that as I really like wide hems, especially in a flowing fabric like rayon. The heart-shaped neckline is beautiful: the small change I made there was to lengthen and narrow the straps so it would be a little lower and a little less boxy. (Horrors, such a floozy!! hahaha!!)

The unusual, or rather, vintage, detail in the bodice is that the front side pieces don’t go straight up to the armhole: they curve over to the side seam about 4 inches below it. I liked that look.

I made another change as well. The pattern calls for a side closure, which is the way most dresses were done in those years. It makes for a nice centre back piece, undisturbed by a zipper or buttons. If you want to keep the real vintage look, Lorna explains that snaps, hooks or a metal-toothed zipper are best. I prefer to have none, if I can manage getting the dress on without an opening anywhere! So I tried it on after the initial assembling of the dress and it worked. I normally put my dresses on from the top rather than walk into them and pull them up: so very often no zipper is needed to open it up enough to get into it.

The facings were easy to sew on… I always seem to have trouble with that part, but this pattern worked on the first try! 🙂

Once everything had been put together and properly ironed, I decided to top-stitch all the edges: neckline and armholes. It helps to keep the facings inside and gives it a more casual look.

The capelet is short and flowing, with a turn-over collar. I chose not to line it, but I will fringe it. I am planning to use a 12 in. deep satin fringe trim on it to help it stay on my shoulders better as well as a small clasp from my Treasure Box of vintage buttons and clasps. It may slip off too easily otherwise. I haven’t bought the fringe yet. There are not many colours to choose from at my usual shop: white, red, black, navy or yellow. I am leaning towards the red. I like the punch!

Here are a few pictures of my version of Veronica, in this order: front dress, back dress, front with cape, back with cape. I will post new ones once the fringe is on the capelet.